 Here are the colors I picked out for this quilt. It is for my husband and he wanted one that would not look girly at all. So I tried to go for darker colors and nothing with flowers or swirls. I cut these at 10 inch squares.
So the main idea for this quilt was order since I am still starting out and not brave enough to extend my ability in more colors or in how to mix and match. So my main, what I thought was background color, is the black. Every block sewn was with a black piece and a colored piece. So layer a black square on a color square with right sides together. The next step might not make sense but trust me it works.

Next sew all 4 sides at 1/4 inch. In quilting it is always 1/4 inch seams. You do not back stitch. Inevitably all those seams will be sewn again with another seam. (Side note: Normally people would chose a thread to match or blend with the colors they have chosen for the quilt. Well, I was so excited to do this I forgot till the end that I did not change mine to black. So try to match your thread.)

Now take your ruler, cutting board, and rotary cutter and cut diagonally for all corners. Now you have 4 triangles.

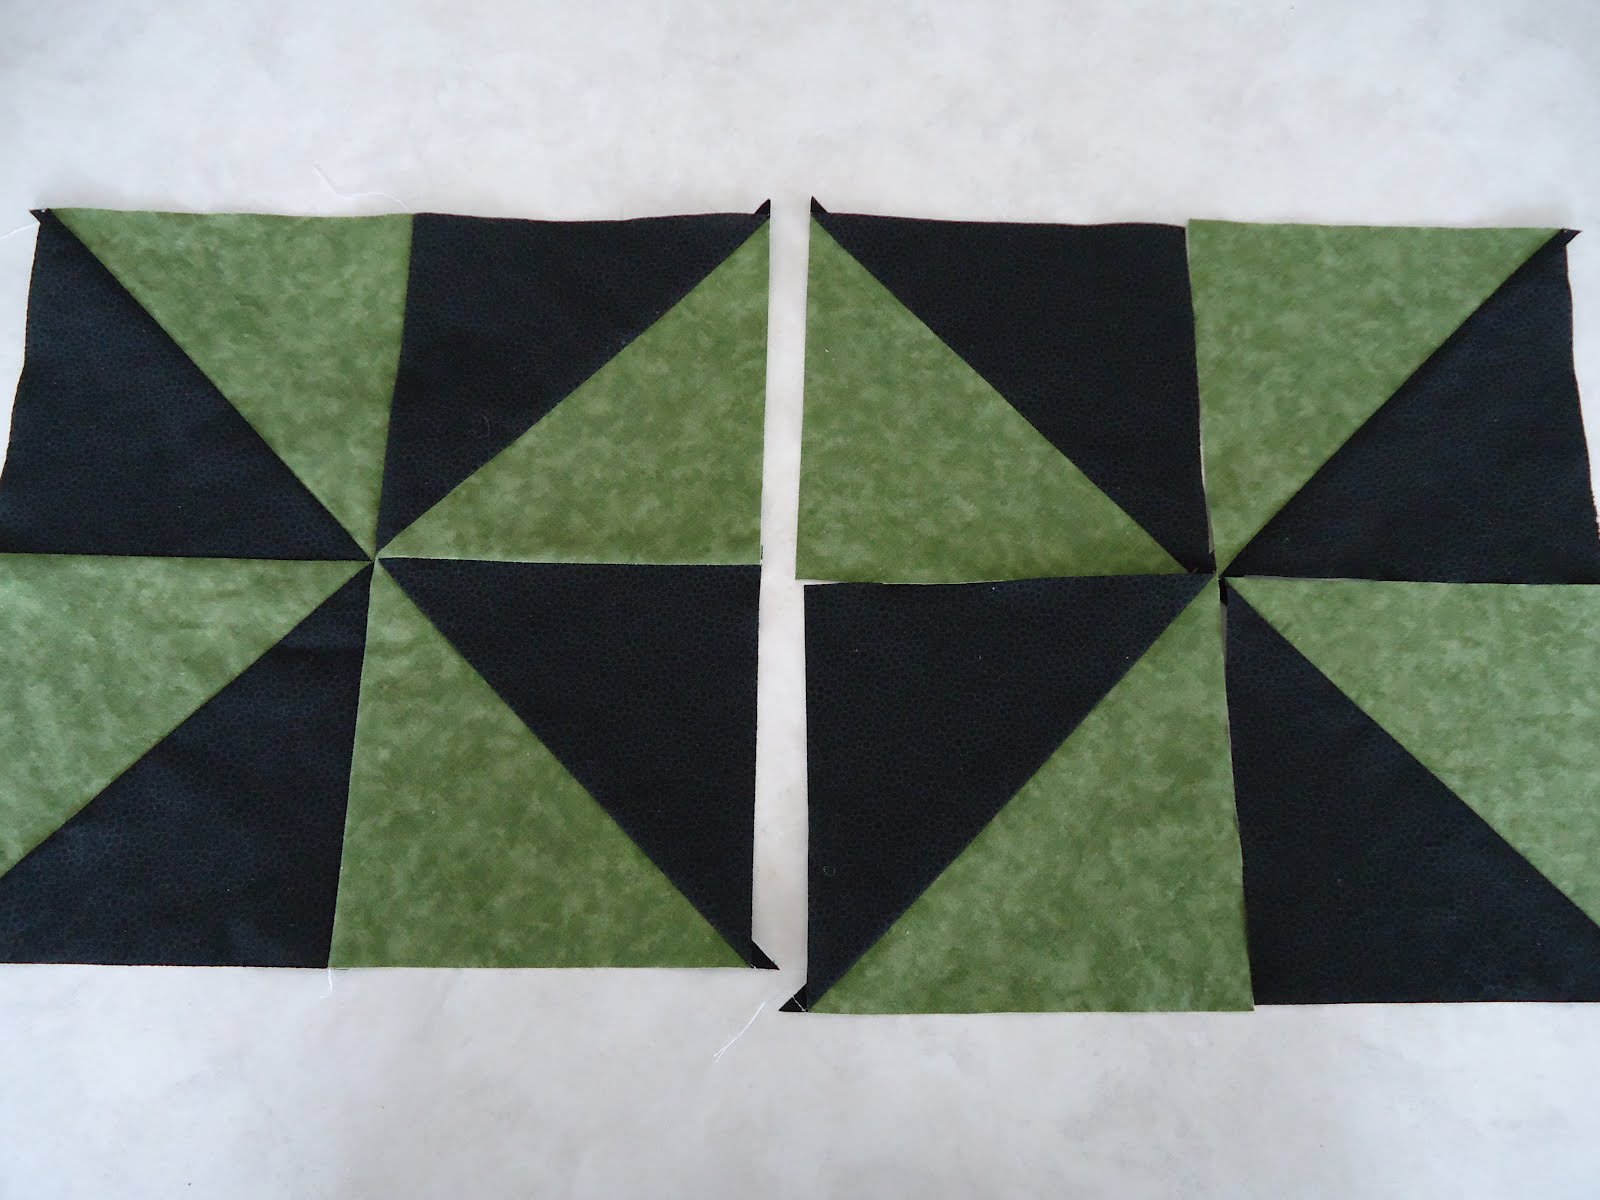
When you open up the triangles you will have 4 squares.

The general thing with quilting is to iron the seam toward the darker side. Lay the triangle on the ironing board the the darker side up. Open the triangle and iron from the lighter side to the darker side. That will then put your seam to the darker side.


When you have all the triangles ironed you are ready to play with the pinwheel. So this is the square all opened.

Now you just turn the pieces to where you want them.

I like to sew in bulk. So I had all my pieces cut out before I started sewing. Then I sewed all the squares. Then I cut all the squares. After that I ironed all of them one color at a time. So this is my stack of half square triangles ready to be put together into pinwheels.

I start off with sewing 2 squares together. And like I said I like to sew in bulk. I only worked on one color at a time. Sew 2 squares together being sure they are pointing the right way. I will explain that in a few pictures. So with this step and the next you can just chain stitch the pieces together. Then again iron the seams.

Once the seams are ironed you can then sew 2 rectangles together. Again I will show you what I mean by making sure they are facing the right way. In this step just be sure all the points come to the center to form the pin wheel.

Also note if all pieces were ironed the right way you should have a seam in this step that "nests" together. That just meant the seams butt up against each other almost like a puzzle piece. Click on the picture to make it larger and that should give you a good idea of what it looks like. You can also feel with your fingers if it is put together right, with a little practice.

Again iron the seam. I know a lot of ironing but it is all worth it!

So this is the square all put together. With 10 inch squares being sewn this way it comes out to be about a 12 inch block. So yes, this quilt is over 8x8 feet. Lots of these and you will have a quilt in no time. See wasn't that easy? But I'm not done yet!

Here is what I was talking about with making sure you turn the pieces the right way. If you are not careful in turning the pieces the right way you will have pinwheels going in the opposite direction.
 So now I am going to skip ahead a bit... sort of. A few options for this kind of quilt would be just sewing all the squares together or you could put sashing's in between all the squares which helps in making a bigger quilt without having to make as many squares. I chose not to do sashing's this time around. In a future quilt I will do sashing's and post on how to do that.
So here is a basics on how I put my quilts together. I think this way is a lot easier to avoid future mishaps for not fitting pieces together. Normally people will sew one row at a time and then sew all the rows together. Well what if you mess up on one of the rows? The when you go to sew the rows together it will not match up right. Then for all the rest of the rows it will not match up right. So I feel my way helps to eliminate a lot of those problems.
So we are going to start from the bottom of my pictures and work our way up. I did the same steps for the top just in the other direction.

So on the bottom row I start with sewing two squares together at a time. Not in and up and down fashion but in a side by side type of thing.

So I know this takes a bit more time but it is worth it. And kind of no fail. So have flipped over one square on top of the other and sewed it then again and again until I had all the row done in 2's. The I did it for the next row too.

And yet again, iron the seam. So now we have rectangles again. I just realized I skipped a step in my picture taking so I will just tell you. Next you will sew 2 sets of rectangles to form a square again. So it will be from bottom row to the one above it. Again, iron the seams. And I would just go to the room, get my 2 pieces I was going to sew together then return it to the layout and then do the next set.

After sewing into squares make rectangles again, see the pattern.

Then sew those rectangles together side beside, while ironing seams throughout.

We now have 2 big pieces and one really big piece. Sew the smaller two together.

Now sew the 2 big sections together trying to match as many seams as you can.

Now your quilt top is ready for a border. That is a step I completely left out because it was the first time I was attempting it. I wish I had taken pictures because it was really easy. But there are many video tutorials that can show how to do it. But I do show you how to do the binding for the most part. And the borders are a lot like the binding. Except you sew the border on one side at a tine. So if you sew the top border first then do the bottom of the border next then the sides.

So I am going to move on with the idea that you have either found another place to learn to do the border or you are not going to do one. I highly recommend doing one.
So now I have the backing laid out with batting on top and then my quilt top. I will show how to do that in a future tutorial. This quilt was way big and would be easier to show you on a smaller scale. It is nice to have the backing and batting a little bigger than the top so you have some moving room.

This is such a big quilt it wold no longer fit in the living room and it barely fit in the dining room. We moved the table out of the way and hoped it would fit here. If it didn't I would have had to take it to church and used the gym.
My Mom helped me and pointed out if you look at it in different directions it looks like a different pattern. So in this picture we see the squares with pinwheels.

In this picture from the corner it looks like a bunch if hour glasses facing in different directions.

So because this quilt is so big, there was now way I was going to pay to get it machine top quilted. So I am tying it instead. So we pin through all the layers of the quilt with safety pins. This holds every thing in place to it can be ties without things shifting.

Yup, its that big! So you start from the middle and work your way out.

I pinned at the corners of the squares.My yarn tie went in all the centers of the pinwheels.

After pinning you can then cut off the extra on the batting and backing.

3 year old's like to help too.

Note to self: Try hard not to get hurt in the process of making a quilt. It really slows things down. I had hurt my foot the Sunday before this picture. It was just getting better then on this day, the Thursday after, I slipped on the first step to go upstairs to put m 5 year old back in bed. Hurt my ankle all over again. Thankfully we were done pinning the quilt and I was going to work on tying it that night. So I sat in bed with ice on my foot while I tied the quilt. It wasn't too bad.

About twice the size it should have been... ouch.

So after tying the quilt I was ready to put on the binding. I do believe here I cut 3 inch stripes which after all is said and done I think they were too wide. I would go more for a 2 inch strip. You will also cut off the white selvage part at the end of the fabric.

So to make the binding sew like the picture shown below. Looks confusing. I am not sure how to explain it in words. It is the ends of 2 different strips with right sides together. Sew diagonally starting with the corner closest to the top of the picture. Then you connect the next strip to the other end of the previous strip. Make sense??

You can chain stitch these too.

Cut off that extra corner. (Check that your strip is straight before you cut) If you sewed the wrong corners the strip will be an L shape.

See? Straight. And again... iron.

While you are at the iron doing the seams you will then fold that nice long strip in half to make it thinner.

Now you can pin that sucker to your quilt with raw edges together. Almost there!! Start somewhere in the middle of one of the sides of the quilt leaving about a 10 inch tail on the strip. When you get close to the end stop with another 10 inch tail from the end of the other tail at the beginning. Take the quilt out of the machine. Match up the ends to where it will fit the quilt. Sew the ends together with a straight line. Cut off the excess quilt and finish sewing it down. This is the tutorial I followed to learn how to do binding and mitered corners. She also has a nice and easy math equation to follow when trying to find out how much material and how many strips of fabric you will need to bind your quilt. Trust me the math works!

Flip the binding over and stitch it down by hand (again same post here further down shows how to stitch a binding down) with a blanket stitch.
Now you are done and have a beautiful quilt waiting to be snuggled with!
Not all my posts will be this long. After this I will refer to this post a lot since it covers a lot of the basics. When there are other tutorials it will be more on just putting together the block and not the whole quilt. Thanks for sticking it out. I hope to get a lot of quilts on here to show you. Not all will be tutorials. In a few months I will be starting a quilting Bee of sorts and hope to show you all the fun things we create. And who knows, I just my try a quilt along or two. We will see!
Wow! That is one BIG quilt! It looks as if your whole family could use it all at once! :) Great choice of colors for a guy quilt. :) What does the final product look like with the binding in place?
ReplyDeleteyeah, i'm blown away at how big it is, too. very cool. i want to make one in shades of pink but way smaller. my girls need a quilt for their bed.
ReplyDeletelooks great shanna!!!!
ReplyDeleteWow! I just said to George, "I will never make a quilt like this for you, but I love you in other ways" :D You are amazing, Shanna. But we all knew that already!
ReplyDeleteYour quilt looks great. I think Hugh could make a tent with it and still stay warm. lol. I'm excited to see your future projects.
ReplyDelete